

Lesson Outcomes:
By the end of this session, learners will be able to:
- Open and navigate Microsoft Word
- Type and edit text in a document
- Apply basic formatting (font size, bold, alignment)
- Save a document correctly
- Send a document via email
Step 1: Open Microsoft Word
- Click the Start Menu
- Search for Microsoft Word
- Click to open it
- Select Blank Document
Step 2: Understanding the ribbon
- The Home Tab

This is the tab you will use the most.
It allows you to:
- Change font (style of writing)
- Change font size
- Make text bold, italic, or underline
- Change text colour
- Align text (left, centre, right)
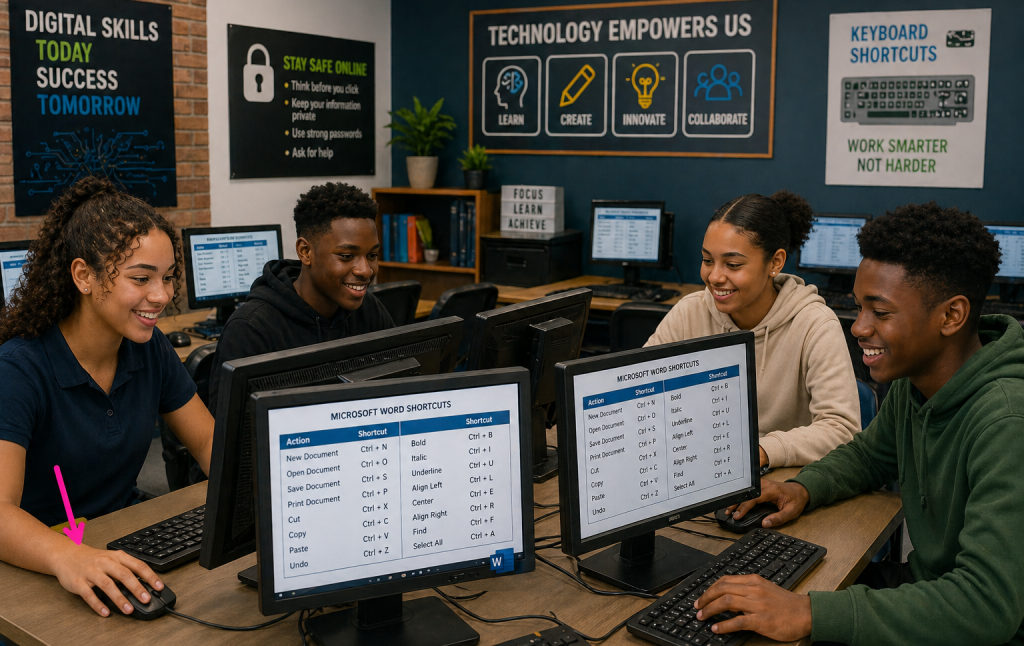
Activity 1:
- Spend some time to see what all the icons can do (Place your cursor on an icon and read its functions).
- Then play our game
Step 3: The Backstage View
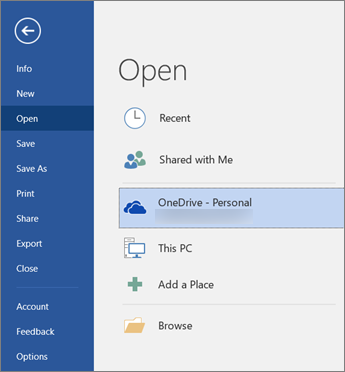
Click on the file tab. This opens the Backstage View
The Backstage View is different from the normal screen.
It is used to manage your document, not edit it.
Here you can:
- Create a new document
- Open an existing document
- Save your work
- Print your document
Step 4: Start Typing and Formatting
Now return to your document and try the following:
- Type some text
- Highlight the text
- Change the font size
- Make the text bold
- Align the text to the centre
Activity 1:
You have been given an exciting opportunity at your school in Knysna. A local organisation is looking for learners to join a youth development programme that helps learners build skills for future careers.
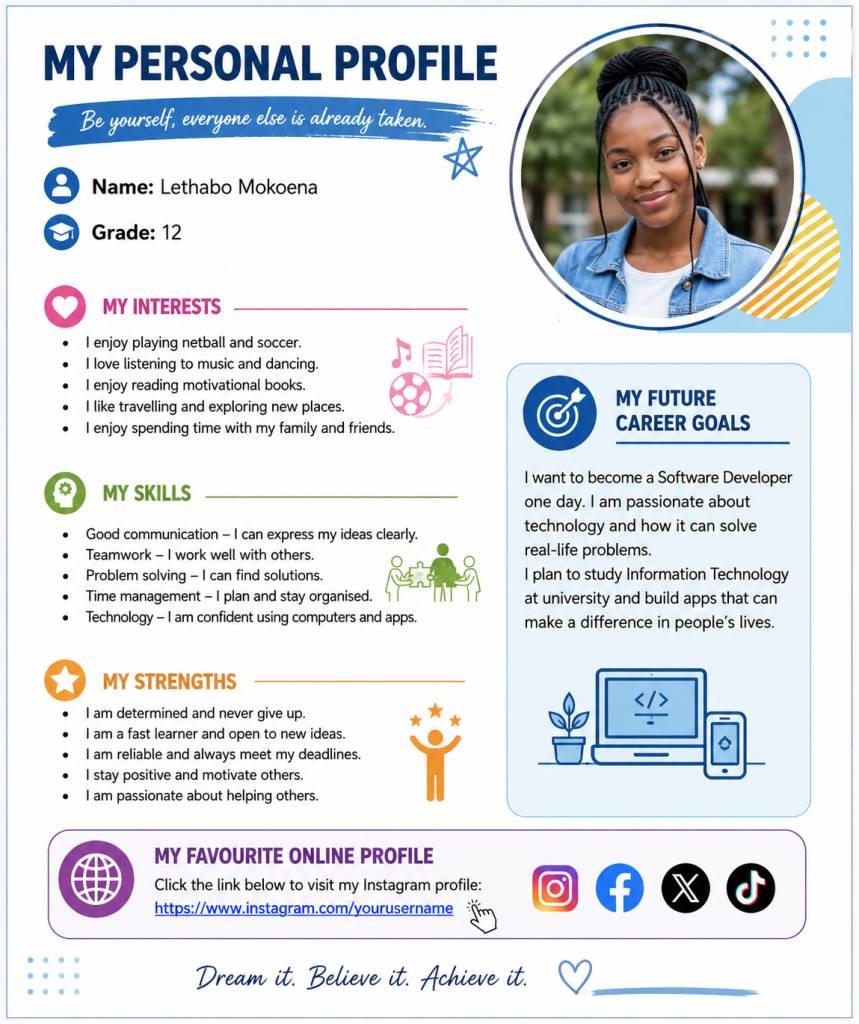
To apply, you need to submit a personal profile document created using Microsoft Word.
- What Your Profile MUST Include:
- Your Name and Grade
- A photo of you
- Your Interests (What do you enjoy doing?)
- Your Skills (e.g. teamwork, communication, sport, technology)
- Your Strengths (What makes you stand out?)
- Your Future Career Goals (What do you want to become one day?)
- Create a hyperlink to your favourite online profile (e.g. Facebook, X, Instagram, Tiktok)
.
- What Word elements will we look for?
- Heading(s) in Bold
- Font must be Arial
- A bulleted list
- Inserted picture(s) that are either left or right aligned with the writing wrapping around it. (Make it look pretty)
- Insert icons where appropriate.
- A coloured shape with text in it.
Step 5: Save your Document
Now let’s save your work:
- Click File → Save As (this opens the Backstage View again)
- Choose a location (e.g. Public Drive / Shared Drive → Your folder that you created, e.g. Piet Pompies)
- Name your file: Name_Surname_Profile.docx
- (e.g. Piet_Pompies_Profile.docx)
- Save the same file as a PDF document
- (e.g. Piet_Pompies_Profile.pdf)
- Email the documents to anidenew@kilt.org.za