


Workshop Goal
By the end of the session, You will be able to:
- Create a clear and professional PowerPoint
- Apply good design principles
- Insert and format content (text, images, shapes)
- Present information effectively
Step 1: Open PowerPoint
- Click the Start Menu
- Search for PowerPoint
- Click to open it
- Select Blank Presentation
Step 2: Understanding the ribbon
- The Home Tab

This is the tab you will use the most.
It allows you to:
- Change font (style of writing)
- Change font size
- Make text bold, italic, or underline
- Change text colour
- Align text (left, centre, right)
- Insert a new slide
Step 3: The Backstage View
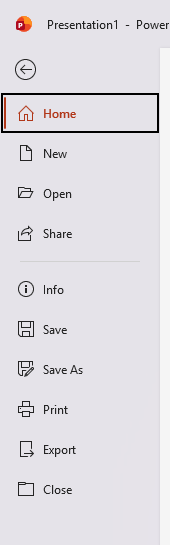
This opens the Backstage View
The Backstage View is different from the normal screen.
It is used to manage your powerpoint, not edit it.
Here you can:
- Create a new presentation
- Open an existing presentation
- Save your work
Step 4: Start Typing and Formatting
Now return to your presentation and try the following:
- Type Your name and surname
- Change the font size
- Make the text bold
- Align the text to the centre
Activity 1:
Create a Power Point Presentation on Water & Sanitation Solutions in Knysna. Use enough images to bring the presentation alive. You have 45 minutes to complete it.
Scenario
The Knysna Municipality is asking young people for creative ideas to improve water and sanitation in the community.
Your task is to design a professional PowerPoint presentation with possible solutions that could help the municipality.
Step 5: Save your Document
Now let’s save your work:
- Click File → Save As (this opens the Backstage View again)
- Choose a location (e.g. Public Drive / Shared Drive → Your folder that you created, e.g. Logan Tony)
- Name your file: Name_Surname_Vocational Focus PPT
- (e.g. Logan_Tony_Vocational Focus PPT)