


Welcome to our Excel training session. Today, we are going back to the basics to ensure we meet you where you are. Our aim is to help you understand each step clearly so that you can work confidently and independently.
Objective
1. To help teachers learn the basic skills to use Excel, manage schedules, and enter marks easily and correctly.
2. To build teacher\'s confidence in using Excel tools for everyday school tasks.
3. To enable teachers to organize and present information clearly using simple Excel features such as sorting and formatting
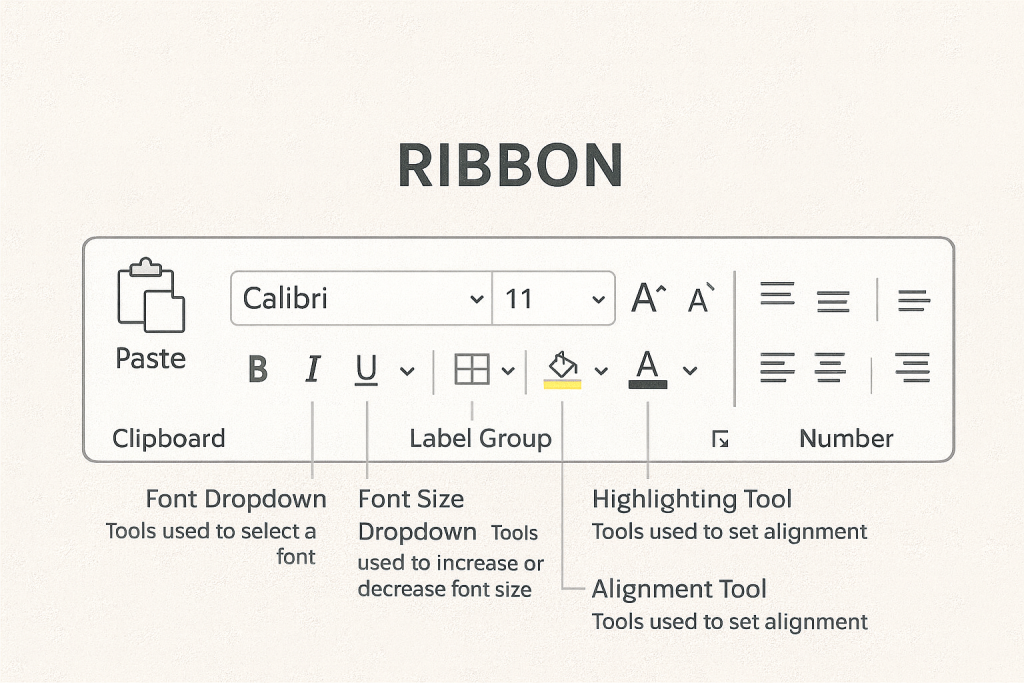
Understanding the Excel Ribbon
Basic Terms to know in Excel:
A cell is a single box in Excel where you type information.
It is like one block in a table.
2. Row
A row is a horizontal line of cells (left to right).
Rows are numbered 1, 2, 3…
3. Column
A column is a vertical line of cells (top to bottom).
Columns are labeled with letters A, B, C…
4. Worksheet
A worksheet is one page inside an Excel file.
Like one sheet inside a book.
5. Workbook
A workbook is the whole Excel file that can contain many worksheets.
Fun Activity
Share a fun fact about yourself and write it in an Excel cell.
Make it look beautiful with some dropdown, font size and highlight
Explaining Key Excel Skills (Point
• Data types: text, numbers, dates, and more
– Text: Words or letters (e.g., Name, Pass, Absent)
– Numbers: Marks or scores that Excel can calculate
– Dates: Use the correct format so Excel recognises them (e.g., 2025/01/10)
– Make sure Excel reads your data correctly to avoid errors
• Entering data (punching marks) into cells
– Click on a cell and type your mark or information
– Press Enter to move down or Tab to move across
– Double-check that marks are typed in the correct row and column
– Use Ctrl + Z to undo mistakes quickly
• Using AutoFill and AutoSum
– AutoFill: Drag the small square on the cell corner to copy marks, days, months, or patterns
– AutoSum: Click the AutoSum button (Σ) to add numbers quickly
– Useful for adding total marks or calculating class averages
Activity:
* Open a new Excel worksheet.
* Create the following column headings in Row 1:
Name & Surname, Age, CEMIS Number, Class, Subject, Teacher, Day, Time
* Type in sample learner information under each heading.
– Example: Type a few learners’ names, ages, and CEMIS numbers.
– Add subjects and times as you would in a real school schedule.
* Use AutoFill to repeat days, times, or subjects without typing them one by one.
* format your cells so the schedule is neat:
– Adjust column width
– Bold the headings
– Add borders to the table
* Check your schedule to make sure all the information is clear and correctly placed
Workshop Outcomes
Easy point-form explanation for teachers on:
How to enter marks into cells.
Tips and tricks for faster data entry.
Understanding data types (text vs numbers).